|
|

This chapter contains detailed installation and configuration information for the EISA PC adapter driver operating in the Microsoft Windows NT environment. The Windows NT driver is available as an optional package for the EISA PC adapter.
Your workgroup EISA PC Driver disk contains all the files you need to install the driver. The drivers required by Windows NT version 3.x are located in the following directory:
\winnt\i386 - for Intel-based x86 machines
This directory is on the EISA PC Driver diskette.
The driver files follow:
OEMSETUP.INF
C320TNT.SYS
For information on versions and date codes, refer to the readme.txt file on the driver diskette.
Before installing the Windows NT driver, you must meet the following requirements:
Confirm that no interrupt address conflicts exist with other add-on cards in your PC. Pay particular attention for ISA card conflicts.
The following section describe how to install the Windows NT driver.
Use this procedure to copy the Cisco FDDI/CDDI EISA adapter driver from the workgroup CDDI/FDDI EISA adapter driver disk into the correct server driver directory.
Step 1 From the Control Panel (see Figure 5-1) double-click on the Network icon.
The Network Settings menu will appear. (See Figure 5-2.)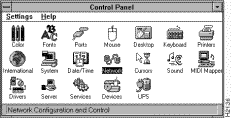
Step 2 In the Network Settings dialog box, click on the Add Adapter button. (See Figure 5-2.)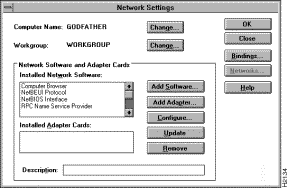
The system prepares a list of network card choices, and the Add Network Adapter dialog box will appear. (See Figure 5-3.)
Step 3 In the Add Network Adapter dialog box, scroll to the end of the list and select <Other> Requires disk from manufacturer from the list of installable adapter cards.
Step 4 Click on the Continue button
The Insert Diskette dialog window will appear. (See Figure 5-4.)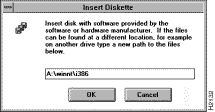
Step 5 Insert the driver diskette into the drive.
Step 6 In the dialog box, enter the path to the workgroup Windows NT driver (for example, A:\winnt\i386).
Step 7 Click on the OK button.
The system will find the file on the disk and load the driver into the Select OEM Option window. (See Figure 5-5.)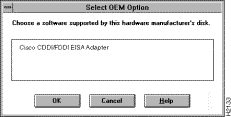
Step 8 The Select OEM Option window will display the name of the driver to be installed.
Step 9 Select Cisco CDDI/FDDI EISA PC Adapter.
Step 10 Click on the OK button to install the driver.
Step 11 The Network Settings dialog box will appear with the Windows NT driver in the list. (See Figure 5-6.)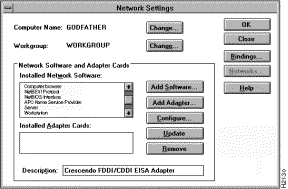
Step 12 After you complete all your changes, close the Network Settings dialog box.
The Network Settings box will appear asking if you want to restart your computer for the changes to take effect. (See Figure 5-7.) 
Step 13 To restart your computer immediately, click on the Yes button.
The new driver will be installed, and the system will be ready to start receiving data using the workgroup CDDI/FDDI EISA adapter card.
![]()
![]()
![]()
![]()
![]()
![]()
![]()
![]()
Posted: Fri Sep 27 08:09:21 PDT 2002
All contents are Copyright © 1992--2002 Cisco Systems, Inc. All rights reserved.
Important Notices and Privacy Statement.